Hiring Workflows
Use this page when you want step-by-step help with a hiring workflow.
Choose a workflow
Opening a role
Start with Request approval for a new role, then Set up the job.
Publishing a role publicly
Use Set up the job, then Publish a job and collect applications.
Sharing jobs on your website or with marketing tools
Use Share the careers page and feeds.
Running an active hiring process
Use Manage candidates, Review one candidate in depth, and Schedule and complete interviews.
Monitoring candidate activity or exporting candidate data
Use Review candidate activity and export data.
Collecting structured candidate answers
Use Use questionnaires.
Emailing candidates consistently
Use Email candidates and use templates.
Cleaning up old jobs or candidates
Use Keep jobs and candidates tidy.
Closing the loop after a hire
Use Move a hired candidate into onboarding.
Building future sourcing
Use Build a talent pool.
Request approval for a new role
Use this when the team needs approval before hiring for a role.
- Open Hiring Requests if the role needs approval before it becomes a job.
- Create the request with the title, description, open positions, company, expected dates, and approvers.
- Wait for each approver to approve or reject the request.
- When the request is approved, convert it into a job.
- Open Hiring Pipeline before publishing or adding candidates.
If your team does not use approval requests, start directly in Hiring Pipeline.
You are done when the request is approved and converted, or when the team has decided to create the job directly.
Set up the job
Use Hiring Pipeline to create the opening, configure stages, and start working from the same place.
Set up:
- title and description
- hiring team
- company, dates, and open positions
- stages and stage owners
- skills and locations
- questionnaire behavior, if needed
- careers page publishing
- application reply
- photo and resume requirements
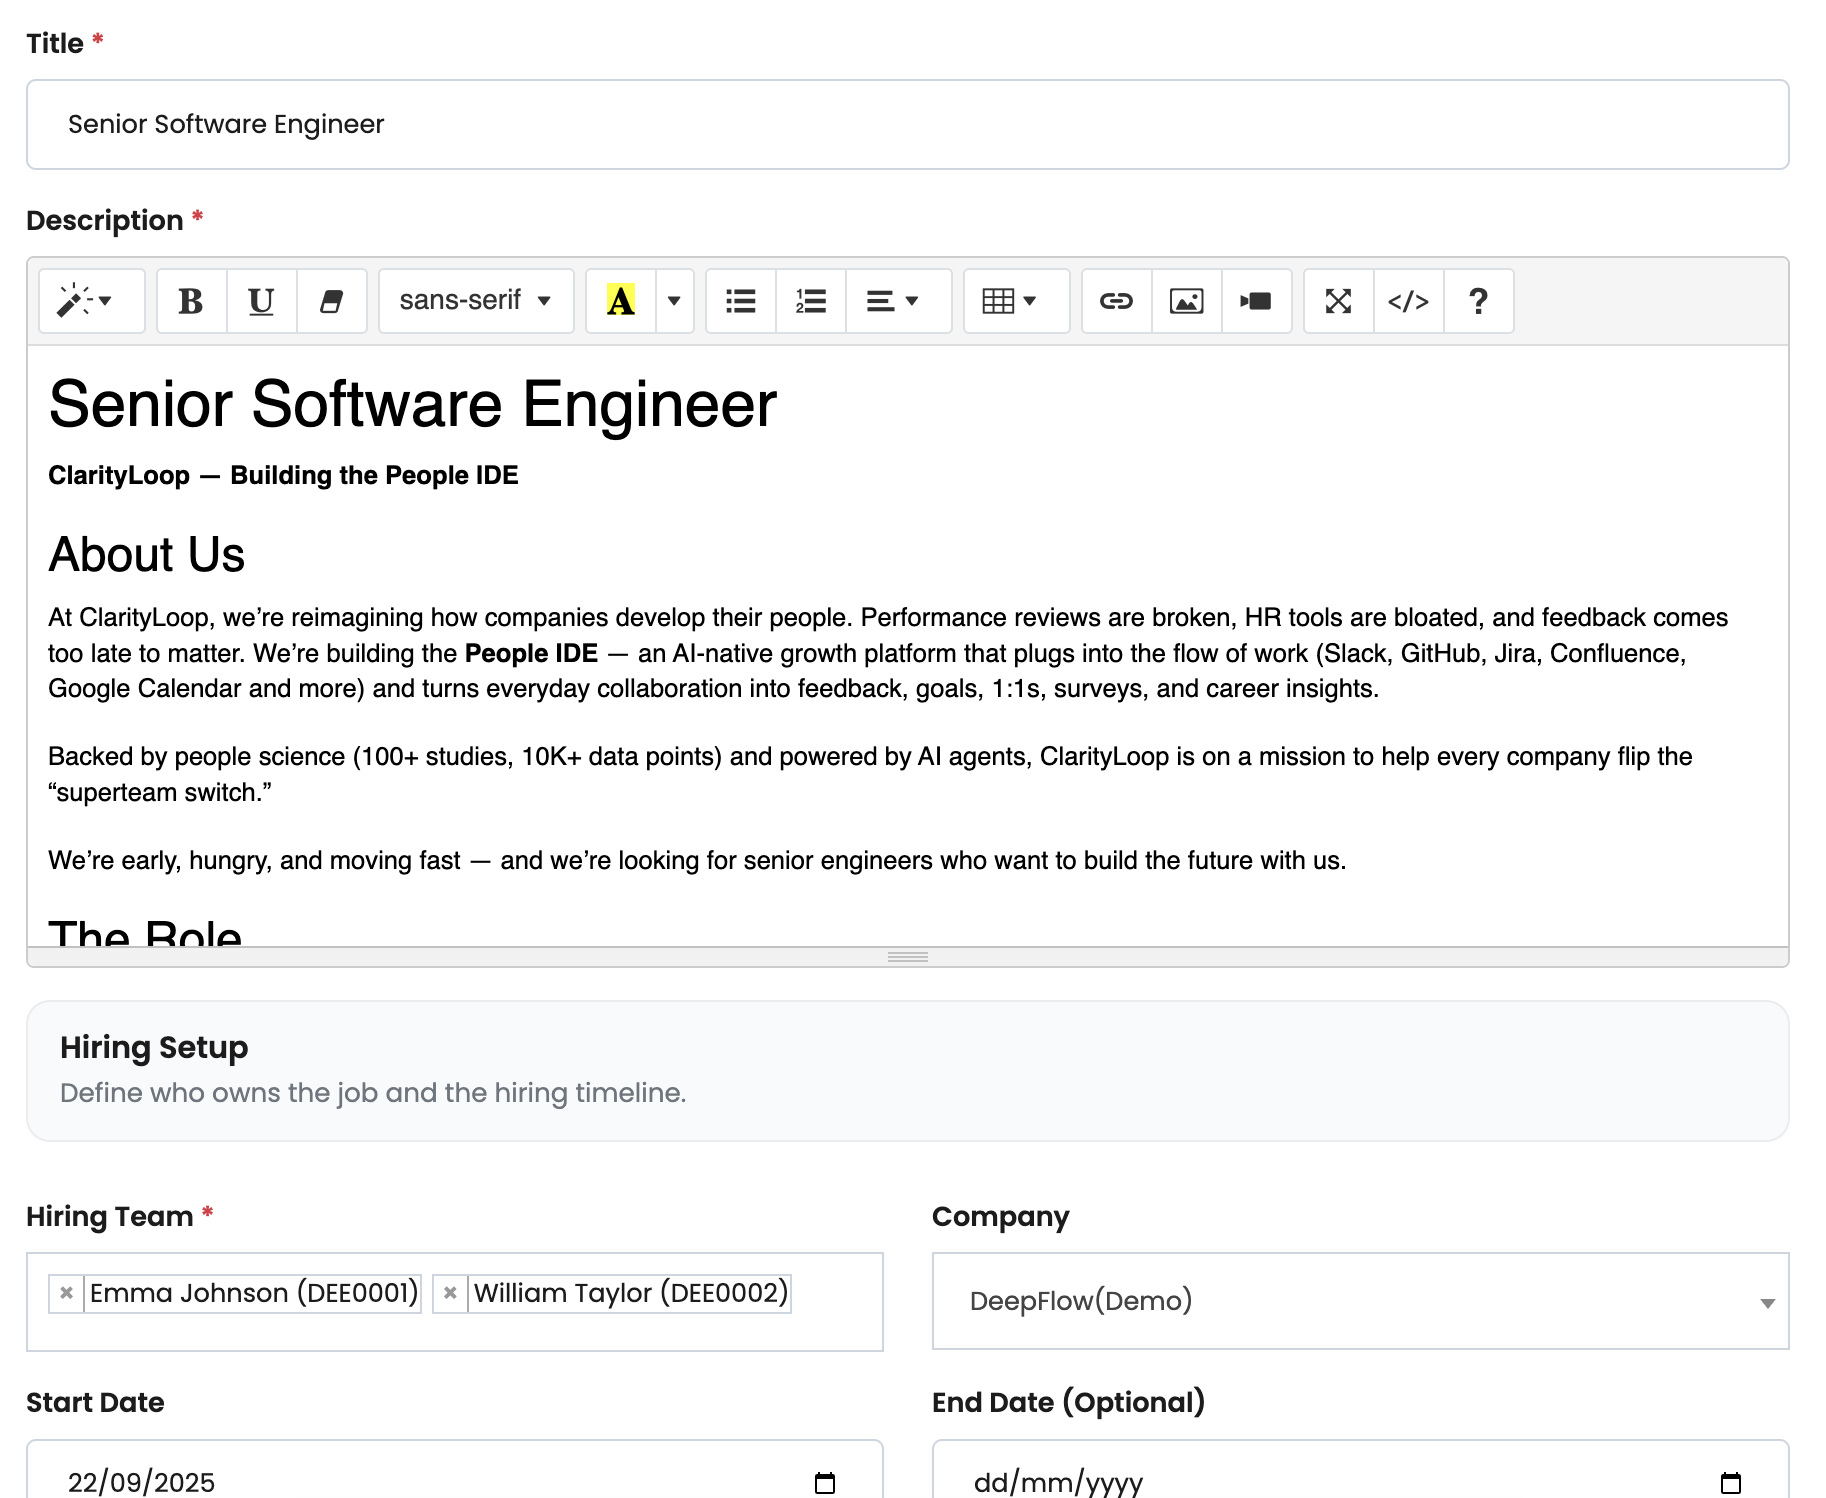
Job descriptions can appear on your hosted careers page, embedded careers page, RSS feed, and LinkedIn feed.
- paste plain text where possible, then format it in the editor
- remove copied styles from Google Docs, Word, Notion, or another website
- use simple headings and short paragraphs
- avoid large pasted fonts, unusual colors, wide tables, or layout-heavy HTML
- use a plain readable style such as Arial at about 11px for body text when you need explicit formatting
Before publishing, check:
- the job is mapped to the right open positions
- the hiring team is assigned
- the stages are simple and in the right order
- the public description is ready for candidates
- the application reply says what candidates should expect next
You are done when the job has owners, stages, candidate requirements, and publishing settings that match how the team plans to hire.
Publish a job and collect applications
Use this when applicants should apply through your public careers page.
- From Hiring Pipeline, open the job settings.
- Make sure the job is active, marked for the Careers Page, and not closed.
- Add locations if candidates should be able to filter by location.
- Choose whether questionnaires should be sent automatically after application.
- Share the Careers Page link, or embed the careers page on your company website.
When someone applies:
- The candidate is created in Hiring.
- They are placed into the job's first working stage.
- They receive the configured application reply, or the default thank-you message.
- Any automatic questionnaires are created for them.
- The hiring team can continue the work from Hiring Pipeline.
Publishing a job means it is eligible to appear publicly. Candidates can see and apply to it when the job is active, published on the Careers Page, and not closed.
If a job does not appear on the Careers Page, check those settings first.
Share the careers page and feeds
Use this when you want published roles to appear somewhere outside HR+.
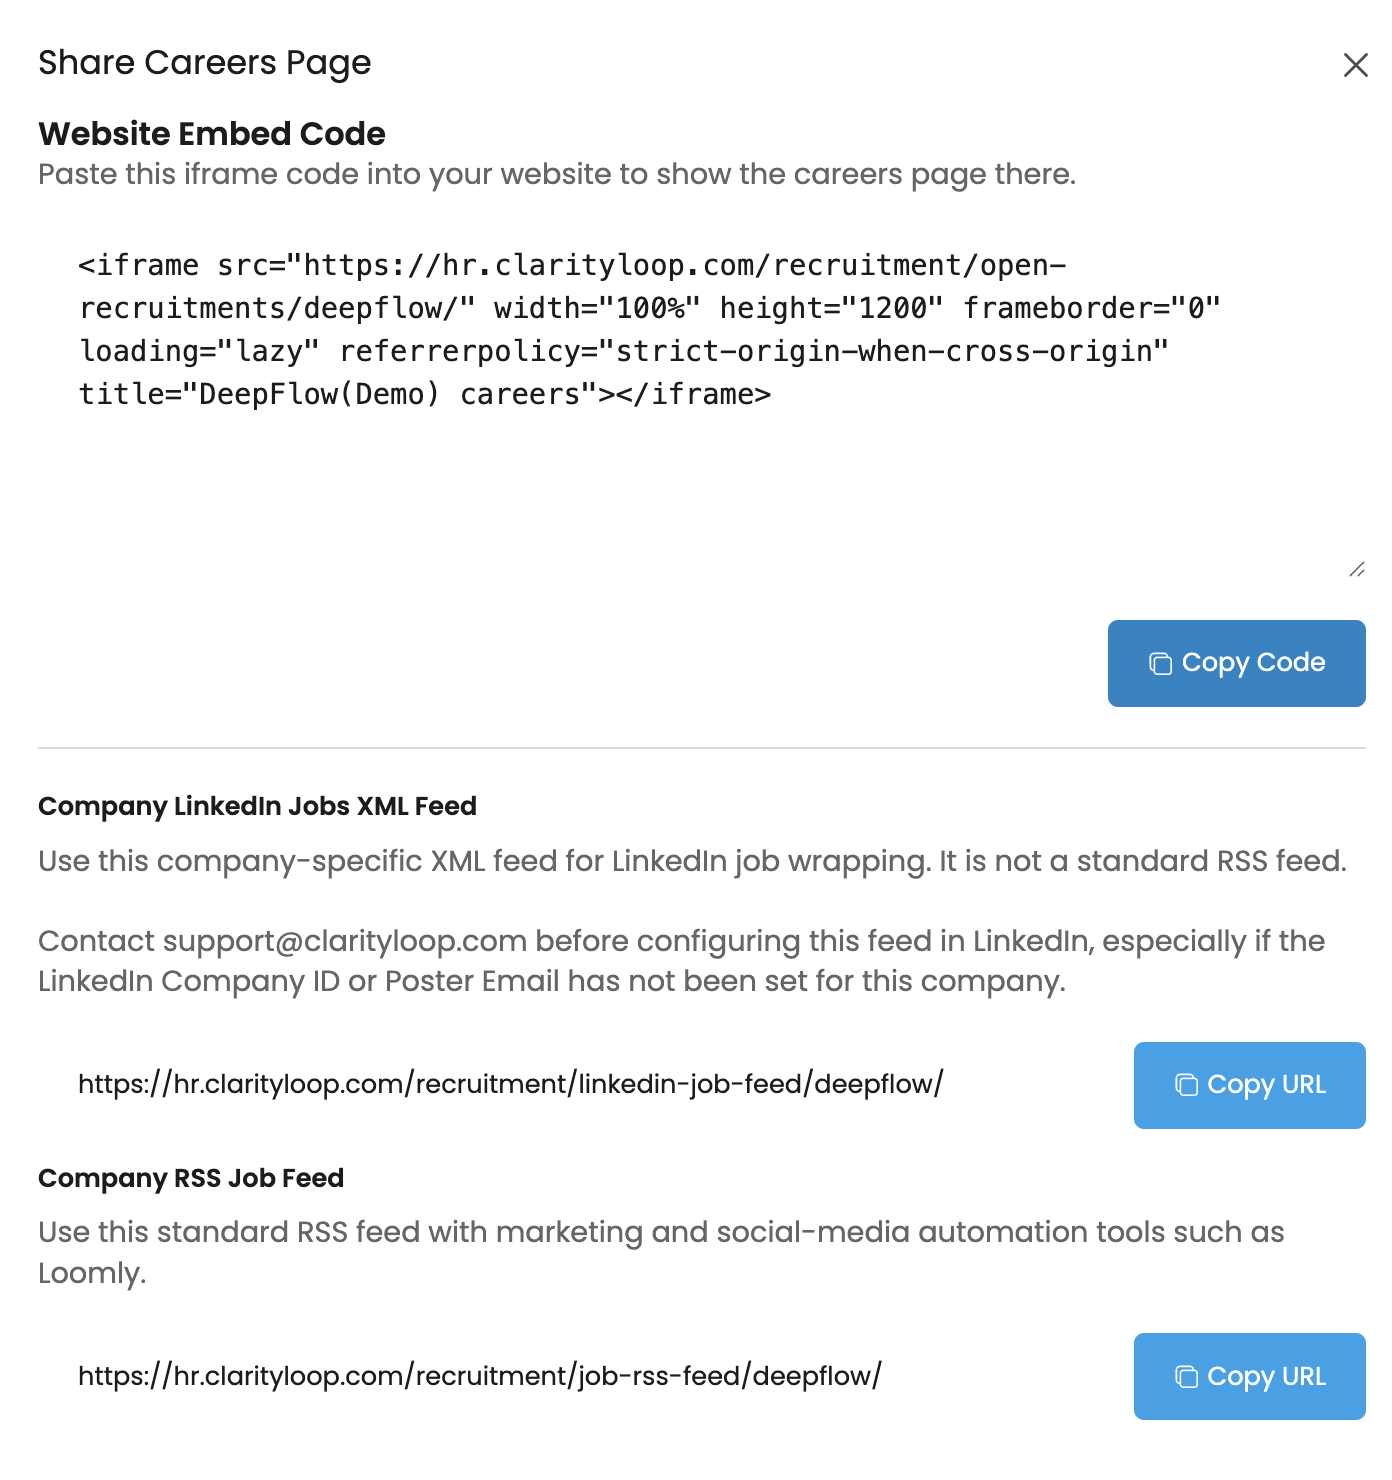
From the authenticated careers page share tools, admins can copy:
- Website embed code: an iframe you can paste into your company website to show the careers page there
- Company LinkedIn Jobs XML Feed: a company-specific XML feed for LinkedIn job wrapping
- Company RSS Job Feed: a standard RSS feed for marketing, social media, or automation tools
Ask support@clarityloop.com if you want:
- a friendlier company slug in the careers page URL
- help embedding the careers page on your company website
- LinkedIn Company ID and Poster Email configured for feeds
- your company included in the consolidated LinkedIn Basic Jobs feed
- feed setup checked before you connect LinkedIn or marketing tools
Support can configure a company slug for cleaner public URLs and can help check feed settings before you connect LinkedIn or marketing tools.
You are done when your public careers page, embedded page, or external feed shows the jobs you expect.
Manage candidates
Use Hiring Pipeline for day-to-day hiring work.
From there, hiring managers and stage owners can:
- choose a specific job
- drag candidates from one stage to another
- update candidate order within a stage
- add a candidate directly into a stage
- add notes
- send emails
- schedule interviews
- rate candidates
- move candidates into a talent pool
Use Hiring Pipeline when the question is "what should happen next?"
Use the candidate profile when the question is "what do we know about this person?"
You are done when every candidate is in the correct current stage and the next action is clear.
Review one candidate in depth
Open Candidates when you need the full picture.
The candidate profile brings together:
- personal details
- job and stage details
- resume and cover letter
- questionnaire answers
- notes
- history
- rating
- mail log
- scheduled interviews
- onboarding status for hired candidates
- linked employee details after conversion
Use notes, history, and the mail log to keep decisions transparent. Notes should capture decision context, not side conversations that will be hard to find later.
You are done when the decision context is recorded well enough that another hiring team member can understand what happened without asking around.
Use questionnaires
Use Questionnaires when you need structured answers from candidates instead of free-form email replies.
Good use cases include:
- pre-screening questions before the first interview
- role-specific questions, such as tools, languages, or availability
- short assessments or take-home prompts
- collecting links, dates, numbers, ratings, or uploaded files
- asking the same questions consistently across candidates for one job
Typical flow:
- Create a reusable questionnaire template.
- Add the questions and choose the right question type for each one.
- Attach the questionnaire to a job in Hiring Pipeline.
- Choose whether it should be sent automatically after application, manually later, or both.
- Review the candidate's answers from the candidate profile.
Questionnaire templates can include different question types:
- Yes/No: a simple checkbox-style answer
- Choices: one answer from a fixed list
- Multiple Choice: more than one answer from a fixed list
- Text or Textarea: short or longer written answers
- Number or Percentage: numeric answers
- Date: a date response, such as availability
- File Upload: a file from the candidate
- Rating: a rating-scale answer
Questionnaire descriptions can use candidate template variables, such as the candidate name or job context. This helps one reusable template feel specific to the candidate and job.
You are done when the right questionnaire is attached to the job and the sending behavior matches how the team wants to collect answers.
Email candidates and use templates
Use candidate email when you need to send follow-ups, interview information, questionnaire links, or outcome updates.
Hiring teams can send email from the candidate context or from Hiring Pipeline. They can write a one-off message or choose an existing email template.
Email templates are useful for:
- application replies
- questionnaire requests
- interview scheduling details
- follow-up reminders
- rejection or next-step messages
- offer or onboarding handoff messages
Email templates can only be set up by a Workspace Owner. Recruiters and hiring managers can use available templates when emailing candidates, but they should ask a Workspace Owner to create or update shared templates.
Template variables can be used in both the email body and the subject. For example, a subject can include {{ instance.get_first_name }} or {{ instance.recruitment_id }} so each candidate receives a personalized subject line.
Common variables include:
{{ instance.get_full_name }}for the candidate's full name{{ instance.get_first_name }}for the candidate's first name{{ instance.recruitment_id }}for the job{{ instance.get_company }}for the company{{ instance.get_email }}for the candidate's email{{ self.get_full_name }}for the sender's full name{{ self.get_first_name }}for the sender's first name{{ self.get_company }}for the sender's company{{ self.get_mail }}for the sender's email{{ self.get_employee_type }}for the sender's employee type{{ self.get_work_type }}for the sender's work type
You are done when the message is clear, uses the right template if one exists, and the mail log shows the message in the candidate record.
Review candidate activity and export data
Use the Activity view in Candidates when admins or workspace owners need a broader operational view of candidate movement.
Activity helps you review:
- when candidates applied
- their current job and stage
- how long they have been in the current stage
- hiring team ownership
- last email and email count
- interview status
- questionnaire status
Candidate exports are useful when you need offline reporting, audit support, or a spreadsheet handoff. Export only the data you need and handle the file carefully, because candidate exports can include personal information.
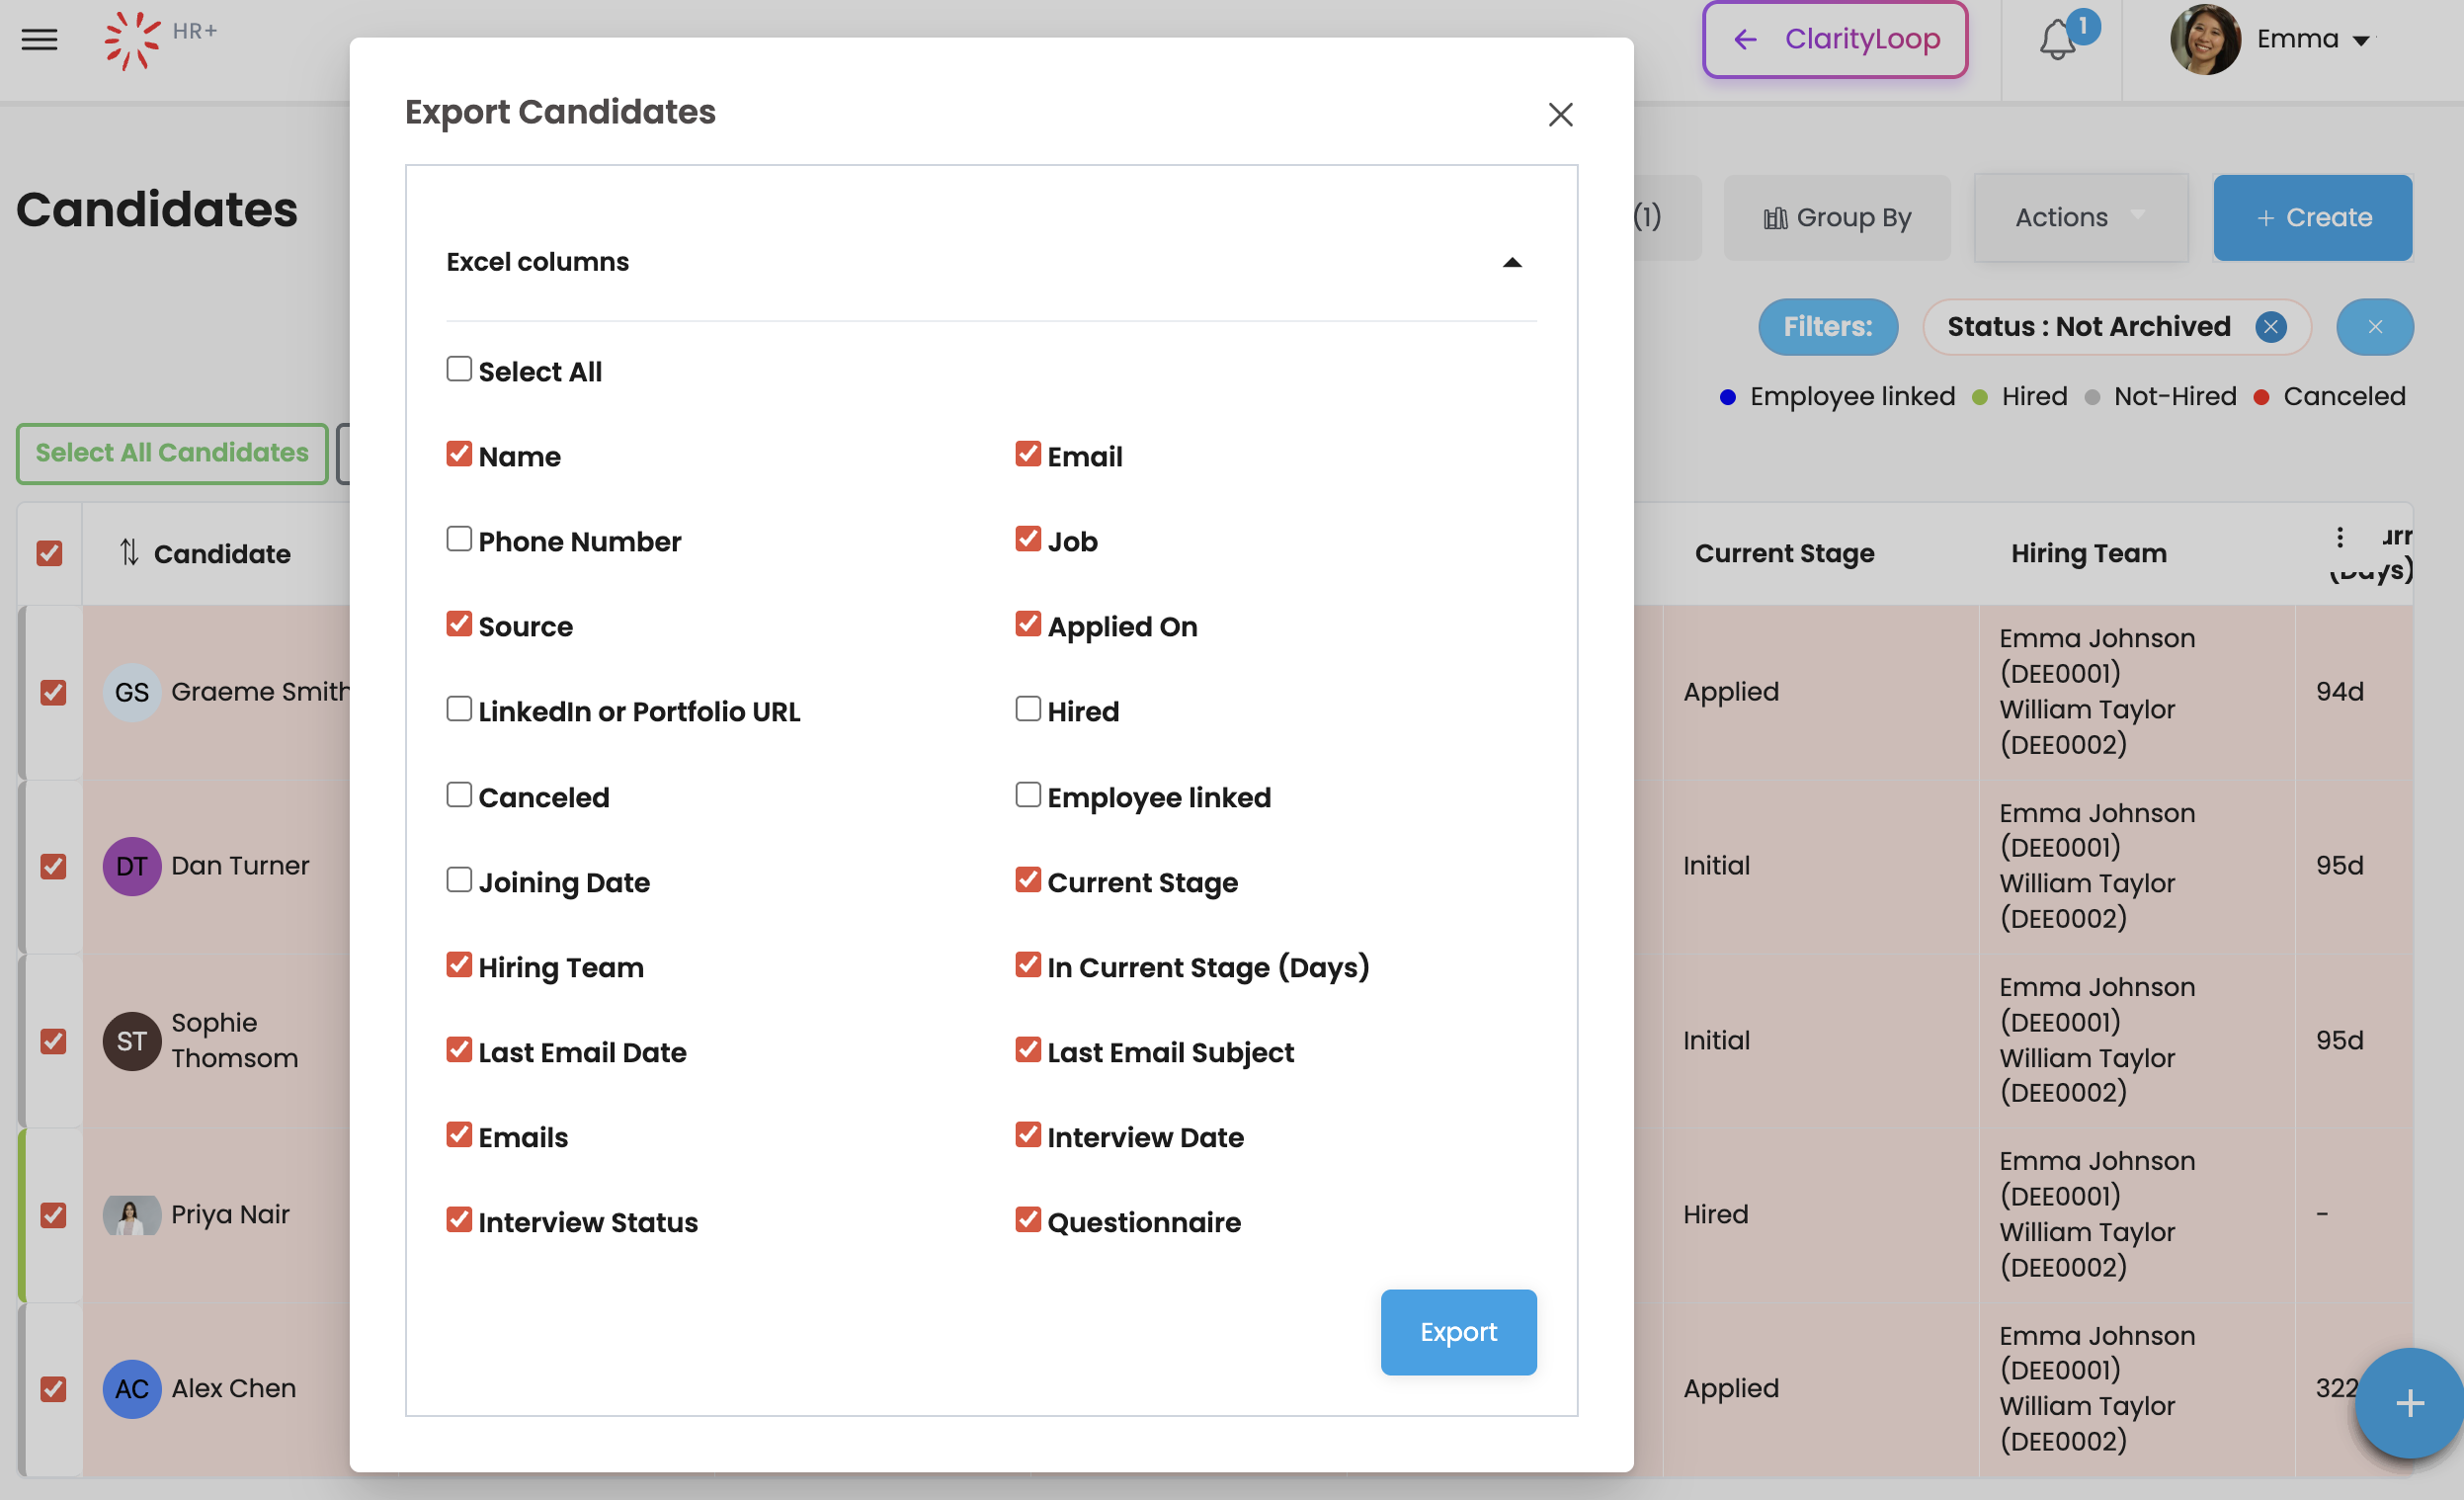
You are done when the exported file or activity view gives you the hiring status/reporting answer you needed.
Schedule and complete interviews
Use Interviews when candidate conversations need to be tracked.
Each interview includes:
- candidate
- interviewer or interviewers
- interview date
- interview time
- description
- completion status
Interviews also appear in the candidate profile. This helps recruiters, hiring managers, and interviewers review the full candidate context before a decision.
Scheduling an interview notifies the selected interviewers inside ClarityLoop. It does not automatically email the candidate. If the candidate needs the interview details, send them a separate candidate email or use an email template.
You are done when the interview is scheduled with the right interviewers and later marked complete after the conversation has happened.
Move a hired candidate into onboarding
Use this when the hiring decision is complete.
- Move the candidate into a Hired stage.
- Use Invite to ClarityLoop when you are ready to invite the person with their company work email.
- After they join ClarityLoop, the hired candidate is linked to the employee profile.
- Continue the journey in Onboarding.
Do this promptly so the handoff from hiring decision to onboarding work is clear.
You are done when the candidate is linked to an employee profile and the onboarding process can begin.
Keep jobs and candidates tidy
Use this when work is finished, paused, duplicated, or no longer relevant.
For jobs:
- Close a job when you want to stop public applications but may need to reopen the role later.
- Reopen a closed job when hiring should continue.
- Archive a job when it should be hidden from active working views but kept for record-keeping.
- Delete a job only when it should be permanently removed and the system allows deletion.
For candidates:
- Cancel a candidate by moving them into a stage with the Cancelled type.
- Archive a candidate when they should leave active views but may need to be restored later.
- Delete a candidate only when the record should be permanently removed and the system allows deletion.
Close a job when applications should stop. Archive a job or candidate when you want it out of active views but may need the record later. Delete only when the record should be permanently removed and the system allows it.
You are done when active jobs and candidate lists only show work the team still needs to act on.
Build a talent pool
Use Talent Pool when someone is promising but not right for the current role.
Good reasons to add someone:
- good fit, wrong timing
- strong interview, no current vacancy
- relevant profile for a later role
- referred candidate to revisit later
Talent pools help the team avoid starting from zero every time a new role opens.
You are done when the candidate is saved with enough context for a future recruiter or hiring manager to understand why they were added.